Securing your Symfony forms with Google reCAPTCHA v2

Google reCAPTCHA is a free service that protects your website from spam and bots. Using Symfony Form with Google reCAPTCHA code will be effective and efficient way of validating the user against bots.
Integrating Google reCAPTCHA is recommended compared to the custom captcha. Indeed, the Product Manager of reCAPTCHA at Google explained:
CAPTCHAs have long relied on the inability of robots to solve distorted text. However, our research recently showed that today’s artificial intelligence technology can solve even the most difficult variant of distorted text at 99.8 per cent accuracy. Thus distorted text, on its own, is no longer a dependable test.
Registering your site on Google ReCAPTCHA
Before starting, you need to register your site and get an API key pair on the Admin Console. It is used to invoke reCAPTCHA service on your website.
Setting the label
Use a label that will make it easy for you to identify the site.

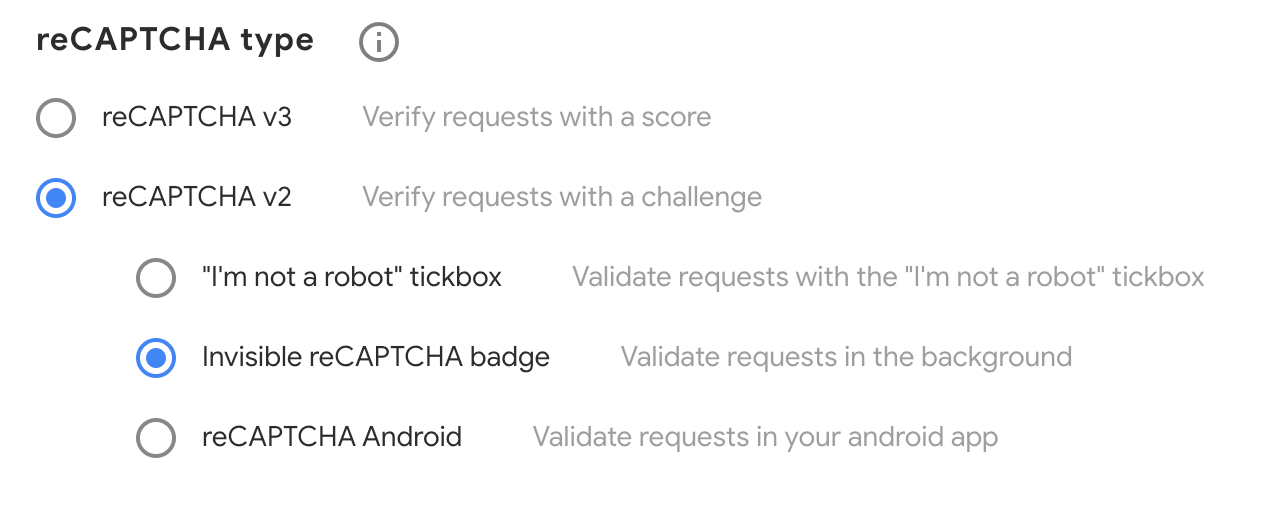
Setting the reCAPTCHA type
Choose the type of reCAPTCHA v2 for your site. A site only works with a single reCAPTCHA site type.
There are different types of reCAPTCHA:
- Checkbox: it requires the user to click a checkbox indicating the user is not a robot.
- Invisible: it does not require the user to click on a checkbox, instead it’s invoked directly via a JavaScript API call. I recommend it that is less intrusive than the checkbox type.
Setting the domains
Your registration is restricted to the domains you enter here, plus any subdomains. A valid domain requires a host and must not include any path, port, query, or fragment.

Note that the localhost domain works for testing.
Configuring your Symfony application
Adding Google API Keys
Add your reCAPTCHA key and secret inside the .env file:
# .env
GOOGLE_RECAPTCHA_SITE_KEY=6LfoM_YUAAAAACd3tyP82gpjQRrjJar-AoHaCyVQ
GOOGLE_RECAPTCHA_SECRET_KEY=6LfoM_YUAAAAAD_e49c6kKAG2_EFYpKPcCWo3bCq
The GOOGLE_RECAPTCHA_SITE_KEY is used to invoke reCAPTCHA service on your site and GOOGLE_RECAPTCHA_SECRET_KEY authorizes communication between your application backend and the reCAPTCHA server to verify the user’s response.
Don’t use this key/secret. It’s only as an example here and are not valid!
Rendering the reCAPTCHA widget
Adding a Twig global variable
Because the site key must be used on the client-side, add a global variable with the key. It will be available in all Twig templates.
# config/packages/twig.yaml
twig:
    globals:
        gg_recaptcha_site_key: '%env(GOOGLE_RECAPTCHA_SITE_KEY)%'
Creating a Form Type class
To reuse the reCAPTCHA in different forms, the best way is to create a form type ReCaptchaType.
// src/App/Form/ReCaptchaType.php
namespace App\Form;

use Symfony\Component\Form\AbstractType;

class ReCaptchaType extends AbstractType
{
}
If you’re using the default services.yaml configuration, nothing to do! Otherwise, create a service for this form class and tag it with form.type.
Making the ReCaptchaType configurable
Add reCAPTCHA type as an option. By default, it will be invisible:
// src/App/Form/ReCaptchaType.php
namespace App\Form;

use Symfony\Component\Form\AbstractType;
use Symfony\Component\Form\FormInterface;
use Symfony\Component\Form\FormView;
use Symfony\Component\OptionsResolver\OptionsResolver;class ReCaptchaType extends AbstractType
{
    /**
     * @inheritDoc
     */
    public function buildView(FormView $view, FormInterface $form,   array $options)
    {
        $view->vars['type'] = $options['type'];
    }    /**
     * @inheritDoc
     */
    public function configureOptions(OptionsResolver $resolver)
    {
        $resolver
            ->setDefault('type', 'invisible')
            ->setAllowedValues('type', ['checkbox', 'invisible']);
    }
}
Creating the Form Type template
You need to custom the template to add the reCAPTCHA attributes to the HTML form.
First, create a new Twig template anywhere in the application to store the fragments used to render the types and updates the form_themes option to add this new template:
# config/packages/twig.yaml
twig:
    form_themes:
        - 'form/custom_types.html.twig'
        - '...'
Create the form type template:
{# templates/form/custom_types.html.twig #}
{% block re_captcha_row %}
    <div id="{{ id }}" data-toggle="recaptcha" data-type="{{ type }}">
    </div>
{% endblock %}
Each element with data-toggle="recaptcha" will be rendered as a reCAPTCHA widget.
Adding reCAPTCHA JavaScript Library
To manage the different ReCAPTCHA’s types, the widget will be rendered explicitly by using the Google JavaScript API. It means that you need to add a callback function to manually render the widget. It will be executed once the Google dependencies have loaded.
Insert the Google JavaScript resource in your template with Google the onload, render and hl parameters. It contains all the logic for reCAPTCHA.
# templates/base.html.twig
<body>
    <script type="text/javascript" src="https://www.google.com/recaptcha/api.js?onload=onGoogleReCaptchaApiLoad&render=explicit&hl={{app.request.locale}}" async defer></script>
</body>
Explicitly render the reCaptcha
Create the callback onGoogleReCaptchaApiLoad() function before the reCAPTCHA API loads. Each element with data-toggle="recaptcha" will be rendered as a widget.
<body>
    <script type="text/javascript">
        /**
         * The callback function executed
         * once all the Google dependencies have loaded
         */
        function onGoogleReCaptchaApiLoad() {
            var widgets = document.querySelectorAll('[data-toggle="recaptcha"]');
            for (var i = 0; i < widgets.length; i++) {
                renderReCaptcha(widgets[i]);
            }
        }
    </script>
    <script type="text/javascript" src="https://www.google.com/recaptcha/api.js?onload=onGoogleReCaptchaApiLoad&render=explicit&hl={{app.request.locale}}" async defer></script>
</body>
Create the renderReCaptcha(widget) function that will be used to render the widget thanks to the data-type attribute.
/**
 * Render the given widget as a reCAPTCHA
 * from the data-type attribute
 */
function renderReCaptcha(widget) {
    var form = widget.closest('form');
    var widgetType = widget.getAttribute('data-type');
    var widgetParameters = {
        'sitekey': '{{ gg_recaptcha_site_key }}'
    };

    if (widgetType == 'invisible') {
        widgetParameters['callback'] = function () {
            form.submit()
        };
        widgetParameters['size'] = "invisible";
    }

    var widgetId = grecaptcha.render(widget, widgetParameters);

    if (widgetType == 'invisible') {
        bindChallengeToSubmitButtons(form, widgetId);
    }
}
For the invisible reCAPTCHA, when the user submits the form, this event must be canceled and you need to invoke the challenge and waiting for the Google response. Then the form can be submitted thanks to the callback function.
Create the bindChallengeToSubmitButtons(form, widgetId) function to invoke the challenge and prevent the submit buttons from submitting the form:
/**
 * Prevent the submit buttons from submitting a form
 * and invoke the challenge for the given captcha id
 */
function bindChallengeToSubmitButtons(form, reCaptchaId) {
    getSubmitButtons(form).forEach(function (button) {
        button.addEventListener('click', function (e) {
            e.preventDefault();
            grecaptcha.execute(reCaptchaId);
        });
    });
}
To finish, create the getSubmitButtons(form) function:
/**
 * Get the submit buttons from the given form
 */
function getSubmitButtons(form) {
    var buttons = form.querySelectorAll('button, input');
    var submitButtons = [];

    for (var i= 0; i < buttons.length; i++) {
        var button = buttons[i];
        if (button.getAttribute('type') == 'submit') {
            submitButtons.push(button);
        }
    }

    return submitButtons;
}
I recommend you to move the code logic into a captcha.js file and manage JavaScript with the Webpack Encore or Asset components.
# templates/base.html.twig
<body>
    <script type="text/javascript" src="{{ asset('js/recaptcha.js') }}"></script>
    <script type="text/javascript" src="https://www.google.com/recaptcha/api.js?onload=onGoogleReCaptchaApiLoad&render=explicit&hl={{ app.request.locale }}" async defer></script>
</body>
Using the ReCaptchaType to your Forms
Now, you are ready to use the form type to your forms. Try it !
$builder->add('captcha', ReCaptchaType::class, [
   'type' => 'invisible' // (invisible, checkbox)
]);
Verifying the user’s response
When the form gets submit to Server, the Google script will send g-recaptcha-response as a POST data. You need to verify it in order to see whether the user is human or not.
Note that a reCAPTCHA user response token is valid for two minutes.
Installing reCAPTCHA PHP Library
Run the following command from your project directory:
composer require google/recaptcha "^1.2"Registering reCAPTCHA class as Service
The library provides a reCAPTCHA class that needs the secret key.
# config/services.yamlservices:
    ReCaptcha\ReCaptcha:
        arguments:
            - '%env(GOOGLE_RECAPTCHA_SECRET_KEY)%'
Creating a reCAPTCHA Validation Listener
The form events are able to control the form at different steps of the workflow. The form event POST_SUBMIT will be used to verify the user’s response. If the result is not a success, a FormError will be created on the reCaptchaType form type to make the form root invalid.
To make it, create an Event Subscriber to the FormEvents::POST_SUBMIT :
namespace App\Form\EventListener;

use Symfony\Component\EventDispatcher\EventSubscriberInterface;

class ReCaptchaValidationListener implements EventSubscriberInterface
{
    public static function getSubscribedEvents()
    {
        return [
            FormEvents::POST_SUBMIT => 'onPostSubmit'
        ];
    }    public function onPostSubmit(FormEvent $event)
    {
        // verify the user's response
    }
}
You need the ReCaptcha service to check the user’s response. The Request object is used to get the server name, the client IP and the user’s response g-recaptcha-response sent to the POST data.
<?php

namespace App\Form\EventListener;

use ReCaptcha\ReCaptcha;
use Symfony\Component\EventDispatcher\EventSubscriberInterface;
use Symfony\Component\Form\FormError;
use Symfony\Component\Form\FormEvent;
use Symfony\Component\Form\FormEvents;
use Symfony\Component\HttpFoundation\Request;

class ReCaptchaValidationListener implements EventSubscriberInterface
{
    private $reCaptcha;

    public function __construct(ReCaptcha $reCaptcha)
    {
        $this->reCaptcha = $reCaptcha;
    }

    public static function getSubscribedEvents()
    {
        return [
            FormEvents::POST_SUBMIT => 'onPostSubmit'
        ];
    }

    public function onPostSubmit(FormEvent $event)
    {
        $request = Request::createFromGlobals();

        $result = $this->reCaptcha
            ->setExpectedHostname($request->getHost())
            ->verify($request->request->get('g-recaptcha-response'), $request->getClientIp());

        if (!$result->isSuccess()) {
            $event->getForm()->addError(new FormError('The captcha is invalid. Please try again.'));
        }
    }
}
Registering reCAPTCHA Validation Listener to your Form Type
Now, add this event subscriber to your ReCaptchaType form type.
<?php

namespace App\Form;

use App\Form\EventListener\ReCaptchaValidationListener;
use ReCaptcha\ReCaptcha;
use Symfony\Component\Form\AbstractType;
use Symfony\Component\Form\FormBuilderInterface;
use Symfony\Component\Form\FormInterface;
use Symfony\Component\Form\FormView;
use Symfony\Component\OptionsResolver\OptionsResolver;

/**
 * Class ReCaptchaType.
 */
class ReCaptchaType extends AbstractType
{
    /**
     * @var ReCaptcha
     */
    private $reCaptcha;

    /**
     * ReCaptchaType constructor.
     *
     * @param ReCaptcha $reCaptcha
     */
    public function __construct(ReCaptcha $reCaptcha)
    {
        $this->reCaptcha = $reCaptcha;
    }

    /**
     * @inheritDoc
     */
    public function buildForm(FormBuilderInterface $builder, array $options)
    {
        $builder->addEventSubscriber(new ReCaptchaValidationListener($this->reCaptcha));
    }    // ...
}
You are done!
What’s next?
- Analyze your reCAPTCHA reports in the Admin Console.
- Customize the reCAPTCHA widget or badge.
Resources
- The example on my GitHub repository.
- The Google reCAPTCHA developer documentation.